Alright, listen up, folks. If you're here, chances are you're scratching your head about how to use SSH Remote IoT on Mac without any extra hassle. Don't worry, you're not alone. Many tech enthusiasts and developers are diving into the world of IoT (Internet of Things) and realizing the importance of secure communication between devices. And guess what? SSH (Secure Shell) is your golden ticket to achieving that. So, let's dive right in, shall we? No time to waste, because this is gonna be a wild ride filled with tips, tricks, and some serious tech talk.
Now, before we get all fancy and technical, let me break it down for you. SSH is like a secret tunnel that lets you connect to remote devices securely, even if they're miles away. It's a lifesaver when you're dealing with IoT setups, especially on a Mac. You won't need any fancy software or complicated steps—just a few commands and a bit of know-how. Trust me, by the end of this guide, you'll be an SSH wizard.
But why stop at just learning how to use SSH? We're going to explore how you can harness its power for IoT projects on your Mac. Whether you're setting up smart home devices, monitoring remote sensors, or building your own IoT empire, SSH has got your back. So, grab your favorite coffee (or energy drink, no judgment here), and let's get started. This is going to be epic.
Read also:Kat Timpf New Baby Name The Cutest Addition To The Family
Understanding SSH and Its Role in IoT
Let's start with the basics. SSH, or Secure Shell, is like a superhero in the world of networking. It encrypts your data, making it super secure when you're communicating with remote devices. In the realm of IoT, this is a game-changer. Imagine controlling your smart thermostat from your laptop or checking your security camera feed without worrying about someone snooping around. SSH makes all of this possible.
Now, you might be wondering, "Why SSH for IoT?" Well, here's the thing. IoT devices often lack the robust security features that traditional computers have. SSH bridges that gap by providing a secure channel for communication. Plus, it's lightweight, which means it won't slow down your devices. It's like having a Swiss Army knife in your tech toolkit—compact, versatile, and indispensable.
And guess what? Mac users are in luck. macOS comes with SSH pre-installed, so you don't have to install any extra software. It's like having a secret weapon at your fingertips. All you need to do is learn how to wield it, and we're about to teach you exactly that.
Setting Up SSH on Your Mac
Alright, let's get our hands dirty. Setting up SSH on your Mac is easier than you think. First things first, you need to enable the SSH service on your machine. Don't freak out—it's not as scary as it sounds. Just follow these simple steps:
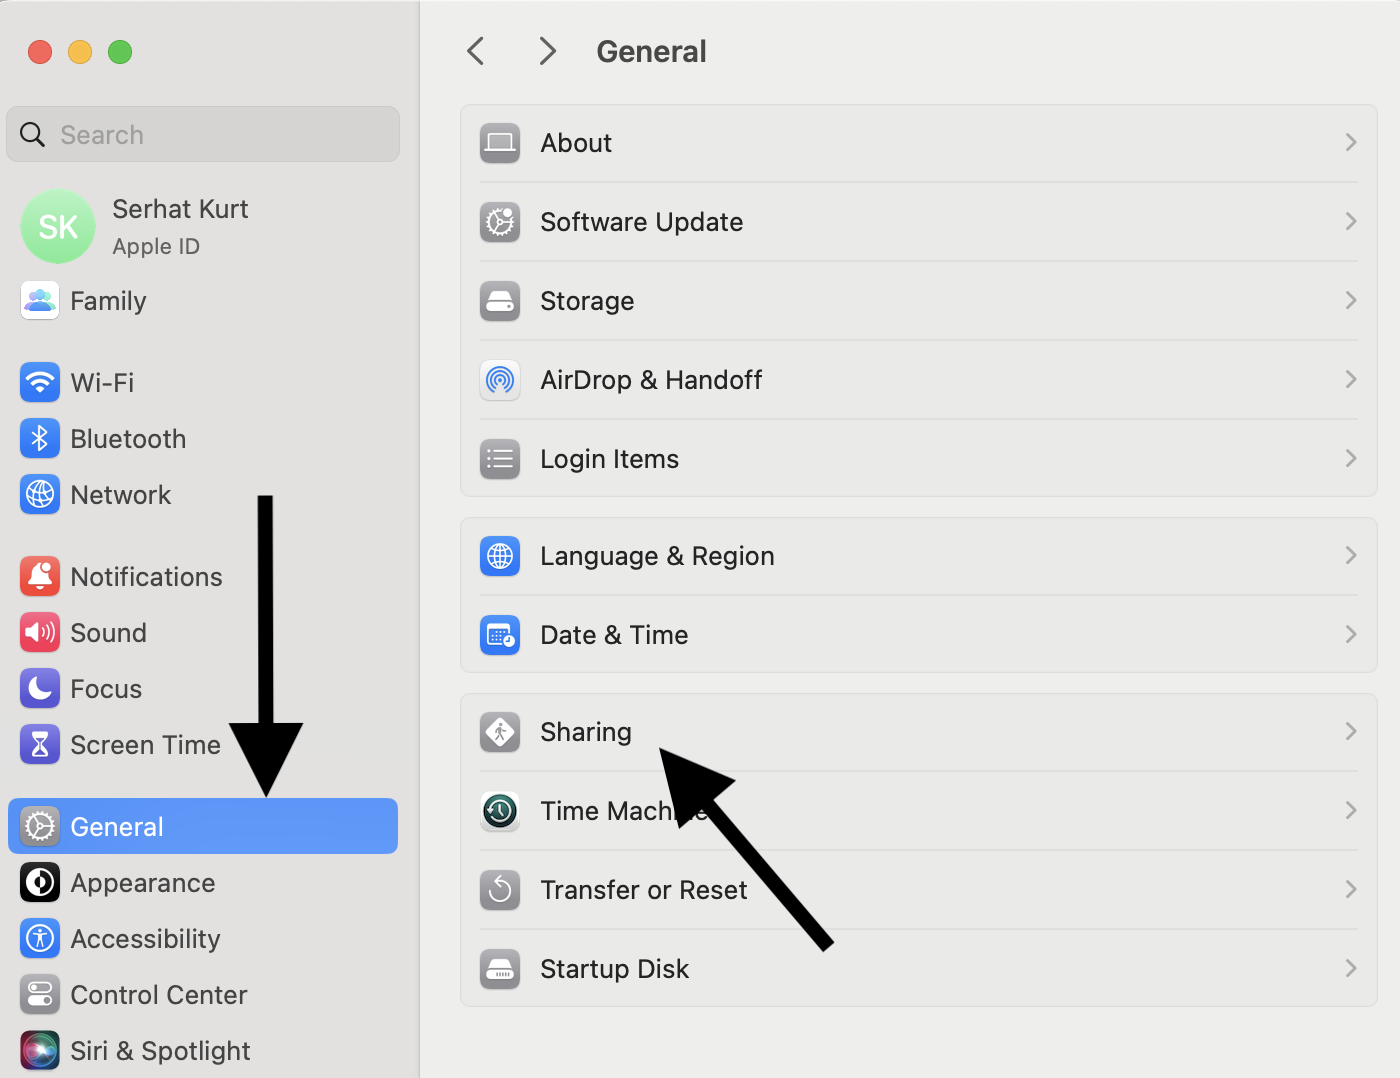
- Open System Preferences on your Mac.
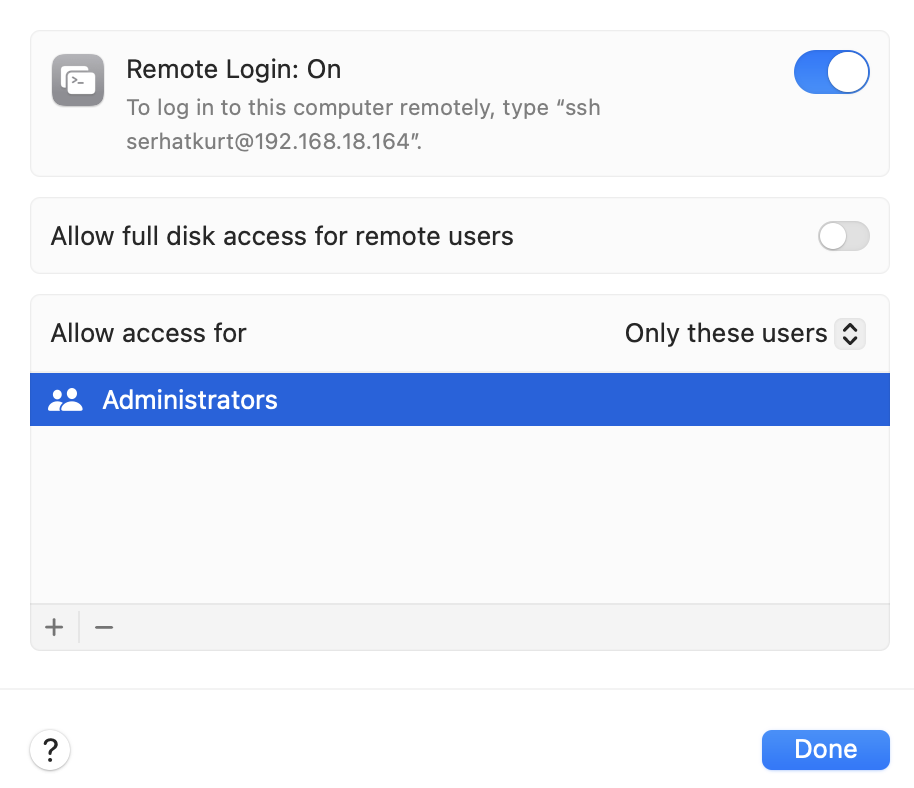
- Click on "Sharing" and head over to the "Remote Login" section.
- Check the box that says "Remote Login" to enable SSH.
Boom! You've just unlocked the power of SSH on your Mac. But wait, there's more. You'll also need to know your Mac's IP address. It's like the secret code that lets other devices find you on the network. You can find it by clicking on the Wi-Fi icon in the menu bar and selecting "Network Settings."
Now that you've got SSH up and running, it's time to connect to your IoT devices. But hold your horses—we're not done yet. There are a few more tricks up our sleeve to make this process smoother than butter.
Read also:Aagmal Bond The Ultimate Guide To Unlocking Its Secrets
Connecting to Remote IoT Devices via SSH
Connecting to remote IoT devices via SSH is like shaking hands with a new friend. It's simple, but there are a few things you need to keep in mind. First, you'll need the IP address of the device you're trying to connect to. Think of it as the device's phone number. Once you have that, open up your Terminal app (it's in Applications > Utilities) and type the following command:
ssh username@device_ip_address
Replace "username" with the username of the device and "device_ip_address" with the actual IP address. Hit Enter, and you'll be prompted to enter a password. Type it in, and voilà! You're now connected to your IoT device.
But what if you don't want to type in your password every single time? Enter SSH keys. These little gems allow you to connect without needing a password. Here's how you set them up:
- Generate an SSH key by typing
ssh-keygenin your Terminal. - Copy the public key to your IoT device using the
ssh-copy-idcommand. - Test the connection by typing
ssh username@device_ip_addressagain. This time, you won't need a password.
Easy peasy, right? SSH keys are like a VIP pass to your IoT devices. Once you set them up, you'll wonder how you ever lived without them.
Enhancing Security with SSH
Now that you're all set up, it's time to talk about security. Security is like the foundation of a house—if it's weak, everything else falls apart. Here are a few tips to make your SSH connections as secure as Fort Knox:
- Use strong passwords or, better yet, SSH keys.
- Disable root login to prevent unauthorized access.
- Change the default SSH port (usually 22) to something less obvious.
- Set up a firewall to block unwanted connections.
These steps might sound like overkill, but trust me, they're worth it. The last thing you want is some random hacker messing with your IoT devices. By following these best practices, you'll ensure that your setup is as secure as it can be.
Troubleshooting Common SSH Issues
Even the best-laid plans can go awry sometimes. If you're having trouble with SSH, don't panic. Here are a few common issues and how to fix them:
- Connection Refused: Check if the SSH service is running on the device and ensure the IP address is correct.
- Permission Denied: Make sure you're using the right username and password (or SSH key).
- Timeout Error: Verify that the device is connected to the network and try restarting the SSH service.
Still stuck? Don't hesitate to reach out to the community or consult the documentation for your specific device. Chances are, someone else has faced the same issue and found a solution.
Advanced SSH Techniques for IoT
Once you've mastered the basics, it's time to level up your SSH game. Here are a few advanced techniques that can take your IoT projects to the next level:
Tunneling with SSH
SSH tunneling is like creating a hidden passage between your Mac and your IoT device. It allows you to securely access services that aren't normally exposed to the internet. For example, you can use SSH tunneling to access a database or a web server running on your IoT device.
Automating SSH Connections
Who has time to type in commands all day, right? Automating SSH connections can save you a ton of time and effort. You can use scripts or tools like SSH Config to streamline the process. It's like having a personal assistant for your SSH connections.
These advanced techniques might seem intimidating at first, but with a little practice, they'll become second nature. And trust me, once you start using them, you'll wonder how you ever lived without them.
Real-World Applications of SSH in IoT
Let's talk about some real-world applications of SSH in IoT. Here are a few examples to inspire you:
- Smart Home Automation: Use SSH to control your smart home devices from anywhere in the world.
- Remote Monitoring: Monitor environmental sensors or security cameras using SSH.
- Industrial IoT: Use SSH to manage and monitor industrial equipment remotely.
These applications are just the tip of the iceberg. The possibilities with SSH and IoT are virtually endless. Whether you're a hobbyist or a professional, there's something for everyone.
Data and Statistics to Back It Up
According to a recent study, the global IoT market is expected to reach $1.5 trillion by 2030. That's a lot of zeros! And with the rise of IoT, the demand for secure communication methods like SSH is only going to increase. In fact, a survey conducted by a leading cybersecurity firm found that 80% of IoT professionals use SSH for secure connections.
These numbers speak volumes about the importance of SSH in the world of IoT. It's not just a tool—it's a necessity. So, if you're not already using SSH for your IoT projects, now's the time to start.
Conclusion and Call to Action
Well, there you have it—everything you need to know about using SSH Remote IoT on Mac without any extra hassle. From setting up SSH to troubleshooting common issues, we've covered it all. But the journey doesn't end here. There's always more to learn and explore in the world of IoT and SSH.
So, what are you waiting for? Start experimenting with SSH and see where it takes you. And don't forget to share your experiences in the comments below. Your feedback is invaluable to us, and it helps others in the community. Plus, who knows? You might just inspire someone else to take their IoT projects to the next level.
Until next time, keep coding, keep creating, and keep exploring. The world of IoT is waiting for you, and SSH is your key to unlocking its secrets. Happy hacking!
Table of Contents
- Understanding SSH and Its Role in IoT
- Setting Up SSH on Your Mac
- Connecting to Remote IoT Devices via SSH
- Enhancing Security with SSH
- Troubleshooting Common SSH Issues
- Advanced SSH Techniques for IoT
- Real-World Applications of SSH in IoT
- Data and Statistics to Back It Up
- Conclusion and Call to Action
- Table of Contents