Picture this: you're sitting in your living room, sipping coffee, and suddenly you remember you left the lights on in your office. No worries! With Raspberry Pi Remote IoT Free, you can control your devices from anywhere, without breaking the bank. This isn't just about convenience—it's about empowering you to take control of your environment using cutting-edge technology that fits your budget. Let’s dive into how Raspberry Pi can revolutionize your daily life and open doors to endless possibilities.
Now, let’s get real for a second. The world is moving faster than ever, and staying ahead of the curve is key. IoT, or the Internet of Things, has become a buzzword for good reason. But what if I told you that you don’t need to spend a fortune to get started with IoT? Enter Raspberry Pi, the little device that could, offering you the power to create a remote IoT system that’s both affordable and scalable.
In this article, we’ll break down everything you need to know about Raspberry Pi Remote IoT Free. From setting up your first project to troubleshooting common issues, we’ve got you covered. Whether you’re a tech enthusiast or a complete beginner, this guide will walk you through the process step by step. So grab your coffee, sit back, and let’s explore the world of Raspberry Pi together!
Read also:Mmsdose Com Your Ultimate Guide To Trending Online Content
What is Raspberry Pi and Why Should You Care?
Raspberry Pi is more than just a tiny computer; it's a game-changer in the world of technology. This credit-card-sized device has taken the tech community by storm, offering endless possibilities for innovation. With its affordable price tag and versatility, Raspberry Pi has become a favorite among hobbyists, educators, and professionals alike.
So, why should you care? Well, Raspberry Pi allows you to create projects that were once only possible with expensive equipment. From home automation to weather monitoring, the sky’s the limit. And the best part? You don’t need a degree in computer science to get started. With a little patience and curiosity, you can harness the power of Raspberry Pi to bring your ideas to life.
Here are a few reasons why Raspberry Pi is worth your attention:
- Cost-effective: Raspberry Pi models start at just $35, making it accessible to everyone.
- Versatile: Compatible with a wide range of peripherals and software, allowing you to customize your projects.
- Community support: A vibrant community of developers and enthusiasts ready to help you every step of the way.
Understanding IoT and Its Importance
IoT, or the Internet of Things, refers to the network of physical devices embedded with sensors, software, and connectivity, enabling them to exchange data. In simpler terms, it’s about connecting everyday objects to the internet, allowing them to communicate and perform tasks autonomously.
But why is IoT so important? In today’s fast-paced world, efficiency and convenience are paramount. IoT allows you to automate tasks, save time, and even reduce costs. Imagine a smart home where your lights turn on automatically when you enter a room, or a garden that waters itself based on weather conditions. These are just a few examples of how IoT can enhance your daily life.
With Raspberry Pi, you can create your own IoT solutions without the need for expensive hardware or complex setups. Whether you’re looking to monitor your home security or control your smart appliances, Raspberry Pi Remote IoT Free is the perfect starting point.
Read also:Jackerman News The Inside Scoop On The Latest Buzz In Entertainment And Beyond
Setting Up Your Raspberry Pi for IoT
Getting started with Raspberry Pi Remote IoT Free is easier than you think. Here’s a step-by-step guide to help you set up your device:
Step 1: Gather Your Materials
Before you begin, make sure you have the following:
- Raspberry Pi (preferably the latest model)
- MicroSD card (at least 16GB)
- Power supply
- Keyboard and mouse
- HDMI cable and monitor (optional)
Once you’ve gathered everything, you’re ready to move on to the next step.
Step 2: Install the Operating System
Raspberry Pi runs on a variety of operating systems, but the most popular choice is Raspberry Pi OS. Here’s how you can install it:
- Download Raspberry Pi Imager from the official website.
- Insert your MicroSD card into your computer.
- Launch Raspberry Pi Imager and select the latest version of Raspberry Pi OS.
- Choose your MicroSD card as the target device and click "Write."
Voilà! Your Raspberry Pi is now ready to roll.
Connecting Your Raspberry Pi to the Internet
For Raspberry Pi Remote IoT Free to work, you need to connect your device to the internet. Here’s how you can do it:
Wi-Fi Setup
Connecting your Raspberry Pi to Wi-Fi is a breeze. Follow these steps:
- Boot up your Raspberry Pi and log in to the desktop environment.
- Click on the network icon in the top-right corner of the screen.
- Select your Wi-Fi network and enter the password when prompted.
That’s it! Your Raspberry Pi is now connected to the internet. If you’re using a headless setup (without a monitor), you can configure Wi-Fi by editing the wpa_supplicant.conf file on the MicroSD card.
Ethernet Setup
If you prefer a wired connection, simply plug an Ethernet cable into your Raspberry Pi and connect it to your router. Your device will automatically connect to the network.
Creating Your First IoT Project
Now that your Raspberry Pi is set up, it’s time to create your first IoT project. Here are a few ideas to get you started:
Smart Home Automation
Control your home appliances remotely using Raspberry Pi. With a few sensors and relays, you can automate tasks like turning lights on and off, adjusting thermostats, and even locking doors.
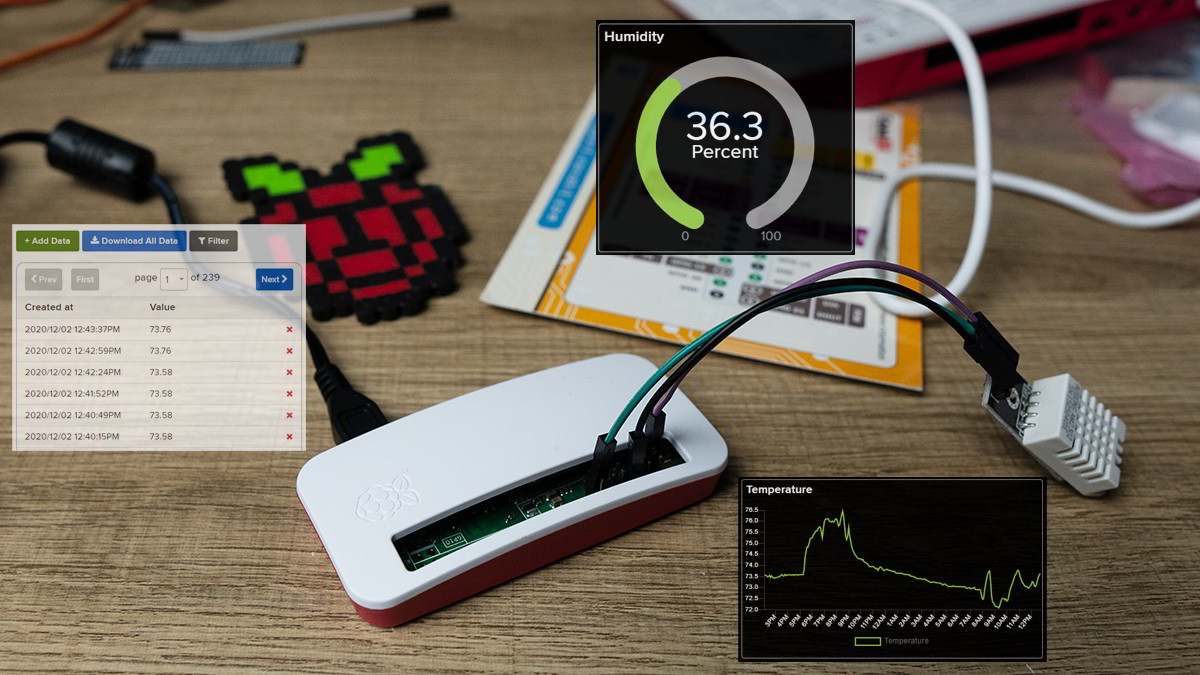
Weather Monitoring
Set up a weather station using Raspberry Pi and a few sensors. Monitor temperature, humidity, and air pressure in real-time and send the data to the cloud for analysis.
Security System
Create a DIY security system using Raspberry Pi and a camera module. Capture images or videos when motion is detected and send notifications to your smartphone.
Troubleshooting Common Issues
Even the best-laid plans can go awry. Here are some common issues you might encounter and how to fix them:
Connection Problems
If your Raspberry Pi isn’t connecting to the internet, check the following:
- Ensure your Wi-Fi credentials are correct.
- Verify that your Ethernet cable is properly connected.
- Restart your router and try again.
Software Glitches
Encountering software issues? Try these solutions:
- Update your Raspberry Pi OS to the latest version.
- Check for conflicts between installed packages.
- Reinstall the operating system if necessary.
Expanding Your Raspberry Pi IoT Projects
Once you’ve mastered the basics, it’s time to take your Raspberry Pi Remote IoT Free projects to the next level. Here are a few ideas to inspire you:
Smart Agriculture
Monitor soil moisture levels and automate irrigation systems to ensure optimal crop growth.
Health Monitoring
Create wearable devices that track vital signs and send alerts if something’s amiss.
Industrial Automation
Use Raspberry Pi to control machinery and streamline production processes in factories.
Resources and Further Reading
Looking to deepen your knowledge? Here are some resources to help you along the way:
- Raspberry Pi Official Website: The go-to resource for everything Raspberry Pi.
- Raspberry Pi Documentation: Comprehensive guides and tutorials for all things Raspberry Pi.
- Instructables: A treasure trove of DIY projects and ideas.
Conclusion: Take Action and Start Building
We’ve covered a lot of ground in this article, from understanding Raspberry Pi Remote IoT Free to creating your first project. The possibilities are endless, and the only limit is your imagination. So, what are you waiting for? Grab your Raspberry Pi, roll up your sleeves, and start building!
Don’t forget to share your projects with the community and inspire others to join the IoT revolution. And if you have any questions or need help, feel free to leave a comment below. Happy tinkering!
Table of Contents
- Raspberry Pi Remote IoT Free
- What is Raspberry Pi and Why Should You Care?
- Understanding IoT and Its Importance
- Setting Up Your Raspberry Pi for IoT
- Connecting Your Raspberry Pi to the Internet
- Creating Your First IoT Project
- Troubleshooting Common Issues
- Expanding Your Raspberry Pi IoT Projects
- Resources and Further Reading
- Conclusion