Picture this—you’ve got a Raspberry Pi sitting on your desk, and you're wondering how to harness its full potential by setting up a Virtual Private Cloud (VPC) network. Well, you're in the right place! If you’ve ever wanted to explore the world of networking and cloud computing without breaking the bank, this article will show you exactly how Raspberry Pi can help you achieve that. Whether you're a hobbyist or a seasoned IT pro, Raspberry Pi has something special for everyone.
Building a VPC network might sound intimidating, but with Raspberry Pi, it's as simple as pie (pun intended). In this guide, we'll walk you through step-by-step instructions to create your very own VPC network. From setting up subnets to configuring firewalls, we’ve got you covered. Think of it as creating your own little slice of the internet, tailored exactly to your needs.
Now, before we dive in, let's clarify why this matters. If you're into DIY projects or looking to experiment with cloud computing, Raspberry Pi is your go-to device. It's affordable, versatile, and packed with features that make it perfect for building a VPC network. Stick around, and we’ll show you just how powerful this tiny computer can be!
Read also:Hyungry Ep 3 The Ultimate Episode Unveiled
What is a Raspberry Pi VPC Network?
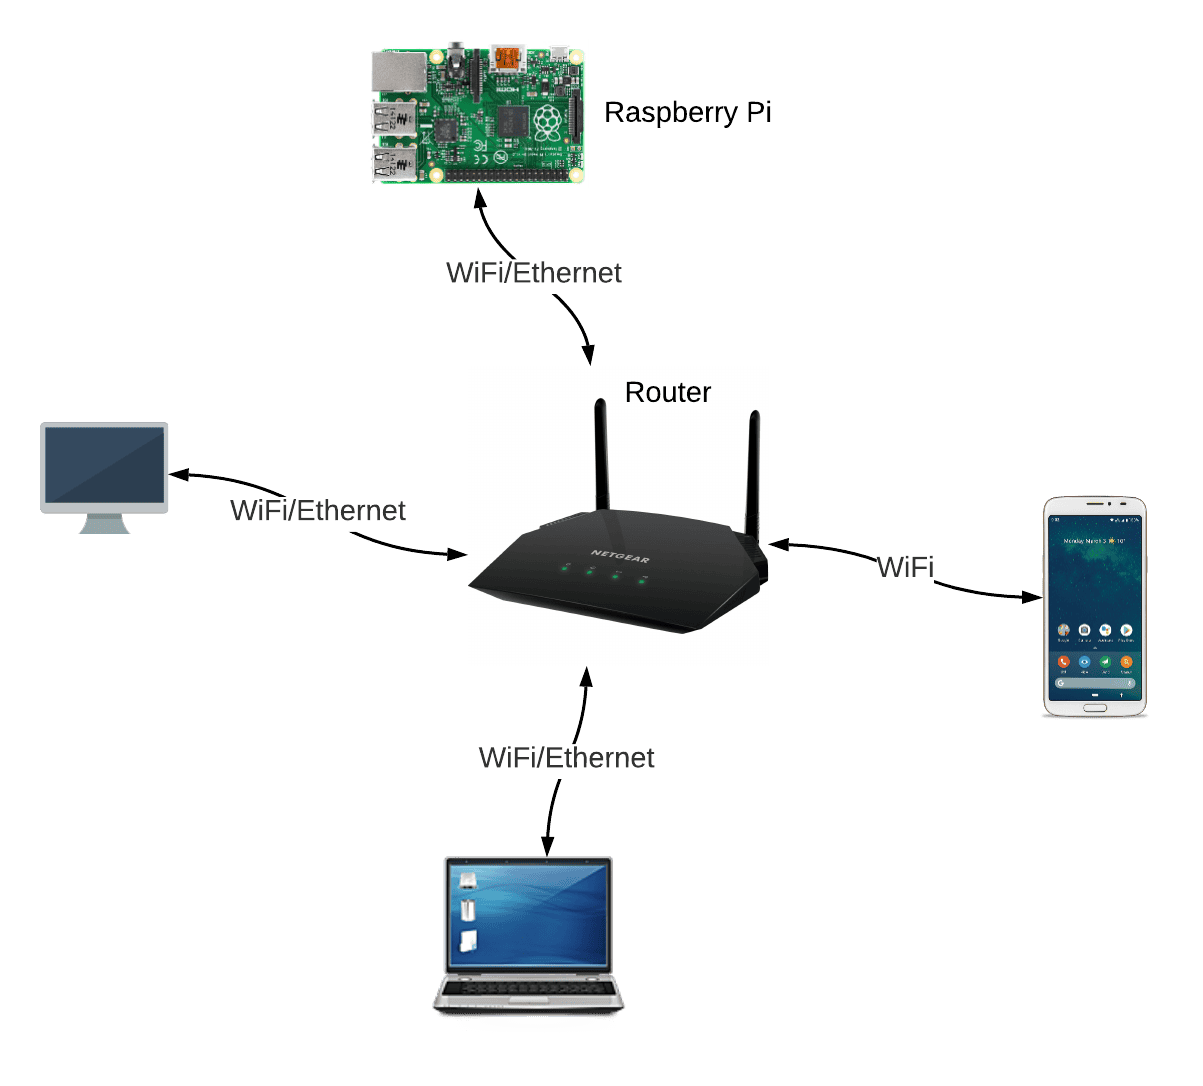
A Raspberry Pi VPC network is essentially a private network environment that you can create using your Raspberry Pi. It mimics the functionality of cloud-based VPCs, but on a smaller scale. This means you can set up isolated subnets, manage IP addresses, and even implement security measures like firewalls—all on your own hardware. Cool, right?
Here’s why a VPC network example with Raspberry Pi is so appealing:
- Cost-Effective: You don’t need expensive servers or subscriptions to experiment with cloud-like setups.
- Customizable: Tailor the network to fit your exact requirements, whether it's for home automation or testing applications.
- Learning Opportunity: It's a fantastic way to learn about networking concepts and cloud infrastructure without the complexity of large-scale deployments.
Why Raspberry Pi is Perfect for VPC Networks
Raspberry Pi is more than just a tiny computer; it's a powerhouse for hobbyists and professionals alike. Its small form factor, low power consumption, and flexibility make it ideal for creating VPC networks. Plus, the vibrant community surrounding Raspberry Pi means you’ll never run out of resources or support.
Some key reasons Raspberry Pi stands out include:
- Wide Range of OS Options: You can choose from various operating systems, including Raspbian, Ubuntu, and even lightweight Linux distributions tailored for networking.
- GPIO Pins: These pins allow you to integrate hardware components, making your network setup even more interactive.
- Community Support: There’s an active community sharing tutorials, scripts, and ideas to help you build your VPC network.
Setting Up Your Raspberry Pi for VPC Networking
Before we get into the nitty-gritty of building your VPC network, let’s talk about setting up your Raspberry Pi. This step is crucial because it lays the foundation for everything else you’ll do.
Hardware Requirements
You don’t need much to get started, but here’s a list of essential hardware:
Read also:Aagmal Bond The Ultimate Guide To Unlocking Its Secrets
- Raspberry Pi Model: Any model from Raspberry Pi 3 onward will work fine.
- MicroSD Card: At least 16GB for the OS and storage.
- Power Supply: A reliable power adapter to keep your Pi running smoothly.
- Ethernet Cable: For a stable connection to your router.
Software Setup
Once you have your hardware ready, it’s time to install the software. We recommend starting with Raspbian or Ubuntu Server, both of which are great for networking projects. Here’s a quick rundown of the process:
- Download the Raspberry Pi Imager from the official website.
- Insert your MicroSD card into your computer.
- Use the imager to flash the chosen OS onto the card.
- Insert the card into your Raspberry Pi and boot it up.
Voila! You’re ready to move on to the next step.
Creating a Basic VPC Network with Raspberry Pi
Now that your Raspberry Pi is set up, it’s time to create your VPC network. We’ll start with the basics and gradually build up to more advanced configurations.
Step 1: Define Your Subnets
Subnets are like little neighborhoods within your network. They help organize devices and manage traffic more efficiently. Here’s how you can define subnets on your Raspberry Pi:
- Decide on the IP ranges you want to use for each subnet.
- Configure your router or DHCP server to assign IPs accordingly.
- Test the setup by pinging devices within each subnet.
Step 2: Configure Routing
Routing ensures that data packets travel between subnets seamlessly. To configure routing on your Raspberry Pi:
- Edit the routing table using commands like
ip route. - Set up static routes if needed for specific devices.
- Verify connectivity using tools like
traceroute.
Advanced Features for Your Raspberry Pi VPC Network
Once you’ve mastered the basics, it’s time to explore some advanced features that can take your VPC network to the next level.
Implementing Firewalls
Firewalls are essential for securing your network. With Raspberry Pi, you can use tools like iptables to create powerful firewall rules. Here’s a quick example:
- Block incoming traffic from unauthorized IPs.
- Allow specific ports for services like SSH or HTTP.
- Monitor traffic logs to detect suspicious activity.
Setting Up DNS
A custom DNS server can make managing your network easier. Use software like dnsmasq to set up a DNS server on your Raspberry Pi:
- Assign friendly names to devices instead of IP addresses.
- Cache DNS queries to improve performance.
- Block unwanted domains for added security.
Real-World Applications of Raspberry Pi VPC Networks
So, what can you actually do with a Raspberry Pi VPC network? The possibilities are endless! Here are a few real-world applications:
Home Automation
Integrate smart devices into your VPC network for seamless control. Use Raspberry Pi to act as a central hub for your home automation system.
Development Testing
Create isolated environments to test applications without affecting your main network. This is especially useful for developers who need to simulate different scenarios.
Troubleshooting Common Issues
Even the best-laid plans can encounter hiccups. Here are some common issues you might face and how to resolve them:
Network Connectivity Problems
If devices aren’t communicating properly, check the following:
- Ensure all devices are on the correct subnets.
- Verify routing tables and firewall rules.
- Restart networking services if necessary.
Performance Bottlenecks
Slow performance can be frustrating. To optimize your Raspberry Pi VPC network:
- Upgrade your hardware if possible.
- Optimize software configurations for better efficiency.
- Monitor resource usage and adjust accordingly.
Conclusion
And there you have it—a comprehensive guide to creating a Raspberry Pi VPC network. From setting up the hardware to implementing advanced features, we’ve covered everything you need to know. Building your own VPC network is not only rewarding but also a fantastic learning experience.
So, what are you waiting for? Grab your Raspberry Pi, follow the steps outlined in this article, and start building your very own VPC network today. Don’t forget to share your experiences in the comments below and check out our other articles for more Raspberry Pi goodness!
Table of Contents
- What is a Raspberry Pi VPC Network?
- Why Raspberry Pi is Perfect for VPC Networks
- Setting Up Your Raspberry Pi for VPC Networking
- Creating a Basic VPC Network with Raspberry Pi
- Advanced Features for Your Raspberry Pi VPC Network
- Real-World Applications of Raspberry Pi VPC Networks
- Troubleshooting Common Issues
- Conclusion